


Timesheets Entry
The Timesheet details page is where you enter your time. Timesheet details include a task, shift, and time. After entering the details your Timesheet Manager will check the timesheet and either approve it for payment, or reject it. Timesheets can be submitted as soon as the details have been entered, or they can be saved as a draft to be submitted later.
For help with changing timesheets that have been rejected by your Timesheets Manager, see the Changing rejected timesheets Help topic.
Steps
-
Sign in to Pegasus Web Xchange.
-
On the Timesheets page, select the Timesheet entry button.
-
On the Timesheets details page, select the
 link.
link. -
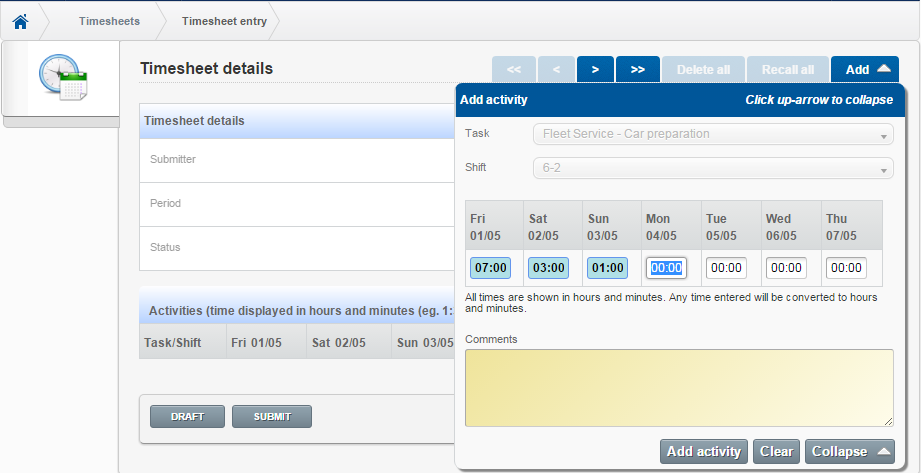
On the Add activity screen, add your tasks, shift and hours. An optional comment can also be entered. Select the
 button to add the line.
 -
To close the Add activity screen, select the
 button.
 -
Select either:
-
Submit to save the timesheet and submit it for approval.
-
Draft to save the entries without submitting them. The entries will be shown when you next open the Timesheets details page.
-
Tip: Select the
![]() button to delete a line.
button to delete a line.
Tip: Select the ![]() button to pin the task to the grid. Pinned tasks will remain in the grid each time you enter a new timesheet. Select the
button to pin the task to the grid. Pinned tasks will remain in the grid each time you enter a new timesheet. Select the ![]() button again to remove it from the grid.
button again to remove it from the grid.